At the end of our meeting yesterday, we talked about my interest in creating and obtaining a frostruder. Two concerns were brought up:
1) How would I utilize the frostruder for the betterment of learning about technology?
2) If I use the frostruder to create my masterpieces of frost (because let's face it, they will be masterpieces) I need to have someone with a food handler's permit make and sell them.
To answer the first concern, I will be frostruding using Frank (of course). In order for Frank to create the masterpieces I have to learn how to render it in a 3D program. This is what I'll be working on this summer. Learning and making drawings so that by the Fall I will be able to create cupcakes/brownies with magnificent frosting creations to sell.
Which in lies the second issue... How am I to sell these without a food handler's permit? Quick and dirty answer would be to get one myself. It's a 28 page read, a 30 min class, and $10 in cash. I figure easing the minds of those concerned over pulled association permits is way better than the tension. :) In the greater scheme of things, this then means that if this whole "college thing" doesn't work out for me I can get a job as a fry cook somewhere. Win.
Thursday, June 3, 2010
Wednesday, May 19, 2010
Trade Secrets
Today's meeting really had something for everyone: laughter, tears (mine, on the inside, from frustration), confusion, listlessness, leadership, inspiration, and dry erase markers.
Our goal this quarter was to make something using Arduino technology. Things seemed to be moving along--we have the Arduinos, and we have this idea for wearable technology that would interface with the touchscreen Chris built. But with two weeks left and no deliverable in sight, we were all feeling a little overwhelmed.
With Beth's help, we redefined our problem. There was all this talk about computer languages versus computer programs, serial ports vs. serial proxies, Flash and Python and pygame and action scripts. And it was becoming increasingly apparent that no one had any answers. Normally, someone at least pretends to have the answers.

I couldn't make sense of anything, so with everyone's help, I drew a map of the problem as it stands now (see photo). My drawing uses an orange squiggle to indicate "translation" of data from one form to another.
On the left hand side of the photo, you can see the Infrared (IR) LEDs paired with an Arduino. The Arduino tells the LED what pattern to flash at. The pattern is associated with a particular user ID, so it conveys the presence and identity of the wearer. The IR data signal goes to an Infrared sensor, which is also paired with an Arduino. The sensor reads the IR data signal, and the Arduino interprets the data and sends it to the computer via a USB cable. A serial proxy in the computer gets the input from the Arduino, and translates the data into code that Flash can read. It's important to keep in mind that at every intersection, code is translating the data from one form to another. It's the type of code and writing the code that present much of our challenge.
Well, that and everything else.
Tuesday, May 18, 2010
Learning About Learning
So I've been exploring the literature on informal education this week, and the most fascinating and relevant research I've found is taking place here at UW at the Learning in Informal and Formal Envrionments (LIFE) Center. LIFE is an NSF supported collaboration between UW, Stanford, and SRI International with the goal of understanding social factors in learning. That is, understanding how social interactions affect learning will help educators design more effective ways of learning (for example, curriculum, environments, leadership).
Check out this infographic that attempts to show the learning environments that LIFE Center researchers study. I think it does a better job showing how much glorious time people have for informal learning. However, I would argue with that figure, 5.1% of formal learning environment in grad school. Maybe "formal learning environment" refers only to the few hours a day I have an instructor in a room with me.

LIFE Center: Stevens, R. Bransford, J. & Stevens, A., 2005
My group members should check out LIFE Center's page on Theory Gates and Social Learning Drivers. The theories should feel pretty familiar after engaging in the Makerbot group.
Saturday, May 8, 2010
Dreaming of Frank
I had a dream about Frank today.
Let me preface this by saying that Frank threw up the other day. It looked like a big, green plastic tumbleweed. I'm not sure how it happened but it did. If we don't watch him he gets ornery.
My future plans with Frank are as follows:
1. Assemble a frostruder.
2.
3. Make profit.
But I digress, so back to my dream.
A mustachioed man (an actual human) named Frank had a bowl full of Frank's tumbleweed throw up and was eating it. Frank was sitting to the side glowing with pleasure.
It was that quick, yet very disturbing.
Thursday, May 6, 2010
Discovery Days at the UW College of Engineering
(text by Alexis, photos by Kate)
On Friday the 23rd and Saturday the 24th of April, the University of Washington hosted the first ever Engineering Discovery Days (formerly the College of Engineering Open House). Engineering Discover Days is a chance for all of the engineering departments on campus to share their work with students, teachers and families. The campus was crawling with K - 12 students on Friday! It was actually a little bit terrifying.
In an attempt to lure the children away from the Department of Chemical Engineering's silly putty exhibit (a tough act to follow!) we brought Frank out to the main lawn where he quickly attracted large groups of kids, parents, and teachers. We had some trouble convincing Frank to print outside but (thanks to Kevin's troubleshooting efforts) we soon had him producing stacks of shiny green PLA legos.
People had lots of questions about Frank and 3d printing in general. Here are a few:
- "Are they going to have these in the FUTURE?!" - excited fifth grader
- "So…what is the practical application of this thing?" - confused parent
- "How does Frank learn what to do?" - intrigued third grader
- "Why does this thing break all the time?" - bored middle schooler
- "Awesome! How come you guys get to play with one of these?!?" - jealous computer science student

In addition to showing off Frank at Discovery Days, we decided to reveal some of our other project ideas to the public. Chris (the newest addition to our group) spent some time showcasing his homemade touch-screen which we will be incorporating into this quarter's big LearnMakeCupcake project.
Here are a few images from Discovery Days.


Wednesday, May 5, 2010
Who is Katy Perry and Why is She Wearing my Dress?
Not the "Lizard in a Garden" dress in the first photo--the second photo, the dress that looks like she's hiding fluorescent lightbulbs under a bedspread. Yeah, it should have been me!
 So I noticed a few weeks ago that some singer named Katy Perry wore LED shoes to some big event. So what? I mean, kids had red LEDs in the heels of sneakers in like, 1992. It's too bad the celebrity spokesperson for technologically exciting clothing is this flash in the pan. I don't mean that, I just wanted to use the phrase "flash in the pan."
Anyway a bit later, Miss LED America turns up on the red carpet in an LED dress, a New York minute after Alexis, Darivanh, and I invented the idea of putting LEDs in our 1980s Goodwill dresses that we are going to wear to the Engineering Ball on May 21st.
Whatever.

Meanwhile, Kevin's been reminding me that whatever you think you want to do, it's already been done. I can't keep pace with technology these days.
On a slightly unrelated note (but only SLIGHTLY), here's a link to a colorscheme designer, if like me, you can't tell what colors go well together. This tool could help you get dressed in the morning or make a pretty website or even build a better looking LED dress.
I heard that a girl in DX Arts made a dress that lights up in different parts of Seattle. It uses GPS and Arduino. It would be hard to get lost in that ensemble.
 So I noticed a few weeks ago that some singer named Katy Perry wore LED shoes to some big event. So what? I mean, kids had red LEDs in the heels of sneakers in like, 1992. It's too bad the celebrity spokesperson for technologically exciting clothing is this flash in the pan. I don't mean that, I just wanted to use the phrase "flash in the pan."
Anyway a bit later, Miss LED America turns up on the red carpet in an LED dress, a New York minute after Alexis, Darivanh, and I invented the idea of putting LEDs in our 1980s Goodwill dresses that we are going to wear to the Engineering Ball on May 21st.
Whatever.
Meanwhile, Kevin's been reminding me that whatever you think you want to do, it's already been done. I can't keep pace with technology these days.
On a slightly unrelated note (but only SLIGHTLY), here's a link to a colorscheme designer, if like me, you can't tell what colors go well together. This tool could help you get dressed in the morning or make a pretty website or even build a better looking LED dress.
I heard that a girl in DX Arts made a dress that lights up in different parts of Seattle. It uses GPS and Arduino. It would be hard to get lost in that ensemble.
Current Happenin's
Life's... a crazy crazy thing. Forgive me for my silence, but between the things of life (in addition to a budding romance) time management tends to fall someplace along the wayside for me to some extent.
Anywho, at our current state of things, we're certainly not at a loss for ideas for what to begin to do (now that we're halfway though our school's Spring quarter). We've considered everything ranging from Electronic Mood-ring-bracelets, to 3-D scanners, to electronic shirts, to touch-screen interactivity. It's wild, and there's some great stuff out there to do, I'd just like to really buckle down and just do it.
At our last meeting, I think we spent most of the time (plus an extra ~20 minutes) discussing more about what we'd like to do and how we'd like to integrate Chris' touchscreen into it, while at the same time wanting to utilize our Arduinos (especially since we basically just got a few). It was decided that we at the very least should be learning the rudimentary bits of programming in flash, which is the language behind most of Chris' applications making use of his multi-touch-ness. Good idea, but I don't think we solidly decided if we're interacting with the presence of the screen, or is the screen interacting with the presence of individuals...or both? And how? We're workin' on that. And when I say we're workin' on that, I mean to say we're eating homemade Pho at Darivahn's place. ;)
PS: Neil Stephenson's The Diamond Age is basically the future, with regards to Maker Bot Industries. Just sayin.
Life's good.
Monday, April 26, 2010
Chris's intro + first thoughts on Arduino
Brand new to LearnMakeCupcake, I'm an undergraduate in the department of Human Centered Design and Engineering focusing on human computer interaction. My interests at the moment include music, improving education, DIY, home automation, aid in the developing world, impacts of new social mediums, and multi-touch technology.
I don’t know much about what can be done with an Arduino but I have some basic knowledge of circuitry and programming in Java that might help. I grabbed one of the Arduino starter kits on Wednesday and we kicked off the learning process with exploring a blinking LED sketch. Alexis helped helped us out and explained the functions of the code. So far the code seems pretty straight forward, but I'm sure it will get a lot more complicated. I’ve started looking around on the interwebs for what the possibilities are with these things. There are a lot of crazy cool, high tech projects out there, I can't wait to start my own. For now I found some basic tutorials that I’ll be going through over the next few days. I’m going to try to learn the basic functions of all the components that came with the kit this week. I'm also exploring ways to use a touchscreen to send messages to the Arduino using the OSC protocol. I'll post an update after I have a few more sketches under my belt.
I don’t know much about what can be done with an Arduino but I have some basic knowledge of circuitry and programming in Java that might help. I grabbed one of the Arduino starter kits on Wednesday and we kicked off the learning process with exploring a blinking LED sketch. Alexis helped helped us out and explained the functions of the code. So far the code seems pretty straight forward, but I'm sure it will get a lot more complicated. I’ve started looking around on the interwebs for what the possibilities are with these things. There are a lot of crazy cool, high tech projects out there, I can't wait to start my own. For now I found some basic tutorials that I’ll be going through over the next few days. I’m going to try to learn the basic functions of all the components that came with the kit this week. I'm also exploring ways to use a touchscreen to send messages to the Arduino using the OSC protocol. I'll post an update after I have a few more sketches under my belt.
Sunday, April 25, 2010
Playing Ketchup
It's been two weeks since I've posted here, but these past few weeks have been quite hectic! I've essentially gone underground, my friends and roommates have had to call to make sure I was still alive. What have I been doing you ask? Well, since my last post, we've had two extremely productive weekends at Metrix Create:Space,and thanks to all the people at the Saturday night Makerbot madness event's, we've finally got frank tuned in and printing ABS quite well. In Darivanh's post, she talked about all the settings that we've changed on Frank to get him printing properly. The ABS parts were coming out great, but then I discovered PLA. My order of PLA, from Makergear arrived on Monday and I never wanted to print ABS again. Before I get into the awesomeness of PLA, let me explain why I ordered it, I'm making a reprap mendel, which is also the reason I've gone underground for the past week. I've been essentially printing nonstop for the past 7 day's, and I've almost today I've finished printing all the parts, all the electronics and steppers have arrived, and my hardware will be here by the end of this week. So in theory, by the time my next post goes up, I'll have a fully assembled reprap mendel. Here's a late night picture of Frank printing. 
Oh yeah we added some green LED's too!
Anyway, when I first started printing PLA I was terrified, since Frank was having difficulty printing ABS(blowing up PTFE heat barrier's left and right), I could only imagine the the onslaught of damage the, more difficult to print, PLA was going to bring. Before I began down this treacherous road, I implemented Matthew's tips, from Darivanh's post, and he also donated a very handy mod for the Makerbot(see below picture).

If you look at the PTFE heat barrier, you'll see a regular 1/2" copper tube coupler, that's has a slit cut down lengthwise, then held tight by a hose clamp. Ever since I've done this mod...well I haven't blown up a heat barrier since.
So as I wait for my reprap hardware to arrive, I've been reviewing my past week, I realized that I could almost quantify an entire week of my life in a physical manner. Essentially every second of down time I had was devoted to printing my reprap, The below picture represents just over 80 hours of my life last week, combine that with roughly 24 credits of school, and you have one extremely busy week!

I didn't include all the electronics, nor did I include all the steppers, but I'm essentially using the Makerbot electronics, with Lin Engineering steppers for my projects. Hopefully I'll have time this coming weekend to put everything together and I'll soon have a working reprap, you'll be hearing from me soon when it's all done!
Thursday, April 22, 2010
We Are Spime Wranglers!
"Having conquered the world made of bits, you need to reform the world made of atoms. Not the simulated image on the screen, but corporeal, physical reality. Not meshes and splines, but big hefty skull-crackingly solid things that you can pick up and throw. That's the world that needs conquering. Because that world can't manage on its own. It is not sustainable, it has no future, and it needs one."
Today I stumbled upon a transcript from a (rather inspiring) speech given by science fiction author Bruce Sterling at a 2004 computer graphics conference.
Sterling begins by giving a brief treatment of the different classes of objects that humans have created throughout history: Artifacts, Machines, Products, Gizmos, and Blobjects. And marching after these classes of objects, says Sterling, will come the Spimes.
Spimes are objects that are "have identities, they are protagonists of a documented process." In Sterling's imagination, Spimes reveal to you information about their origin, ownership, ingredients, ways to customize, and market value. Spimes can update themselves and inform you when they need service. Spimes are open and transparent.
And, perhaps most relevant to the LearnMakeCupcake project—"A true Spime creates spime wranglers. Wranglers are the class of people willing to hassle with Spimes. And it is a hassle. An enormous hassle. But its a fruitful hassle. It is the work of progress. Handled correctly, it can undo the harm of the past and enhance what is to come."
Sterling does not, however, suggest that his vision is without menaces, without a potential dark side. I am in agreement with Sterling there. That's why I want to be a Spime Wrangler. That's why I do HCDE.
Arduino Super Happy Fun Time
We started our evening off with some talk about Discovery Days! For those that don't know, Discovery Days used to be called Open House where the Engineering Departments at the UW showcase themselves. Most of the Engineering departments would not be holding classes that day (except my CSE class! Grrrr) so that students may participate in the event. LearnMakeCupake will be there to show Frank off with his cool new lights and, according to Kevin, has been running smoothly.
The above was written on Thursday afternoon, the day after our weekly Wednesday meeting. Discovery Days is said and done and we're on to continue our project of development in Wearable Social technology.
On Wednesday we had an impromptu arduino session lead by Alexis. The Lillypad and arduino kits had come in and we were overcome with joy. (Pictures incoming) We learned about how to program the arduino to blink. The arduinos use a programming language that needs to compiled tested then uploaded to the arduino.
With the knowledge that we accumulate in the next weeks are so, we hope to develop a system that will bring us closer to Wearable Social Technology.
Tuesday, April 13, 2010
Two Things.
1. I just watched a hypnotic video of someone assembling a simple arduino device. I feel like I know what an Arduino is, and I'm glad I took that electronics class at Metrix.


2. I bought a MacBook on Saturday. Hard to say who loves it more--me or my cat (he's a youtube junkie). Here we are, looking cash poor and technology rich.
Monday, April 12, 2010
Metrix Makerbot Madness was a sure success! And as the norm we were able to get sound advice from our friends at Metrix Create:Space. Apparently, making Frank work (properly) required some tweeking between the heat and the speed, 240 and 210 respectively. (If I remember correctly.)
As I arrived at Metrix last night Kevin had the plastruder separated and tugging on a piece of ABS stuck in the ceramic piece (again). In attendance were: Matt (the owner of Metrix), Nick, Alex, Alexis, Kevin, and 2 high school kids and later Matthew. Matt was able to make another piece (or did he have it laying around, I really didn't clarify that) and Kevin was able to piece it together again.
While we were waiting for Kevin to put Frank together (again), I brought up our idea from the meeting on Wednesday: developing Wearable Social Technology with Matt. Our concept consists of some sort of technology that communicates with an item similar to itself that pings when wearers meet. Here's what I got from our discussion: 1) Matt does not wear many accessories 2) Should this wearable technology multitask? 3) How will this technology communicate the pings? We will definitely be using Lillypad. Matt talked to me about his own idea for Wearable Social Technology, and since I'm didn't ask him if I could blog about the topic, I'll have it said that I would love to see his idea in action. It was great to communicate this idea with him because he had some concept of what we were trying to accomplish. Having that insight raised more questions and allowed us to work out some details. As I brought back the info to the group mates we discussed further our audience type, brainstormed some ideas about what type technology we should use and whether we wanted it to be versatile (ie, jacket, shirt, necklace, have the ability to be placed inside multiple items of clothing. etc.), have a visual display.
Throughout the night we were accompanied by Nick, who helped with some advice on how to fine tune zeroing Frank at the start of printing. His advice led Kevin to declare that once we are confident that Frank can run decently that he would print out a handle for the z-axis. Nick Burrows, for those that don't know, won (that's right I said it, WON) the NASA-sponsored PowerBeaming contest. Amazing people walk through the doors of Metrix.
Matthew came later in the night and told us to change some the settings. Looking at our ceramic piece (I should really find out its name) he told us the heat was too high, which is why the piece was bulging. (Giggle) I have to say that Matthew has been a constant source of help for our group since the beginning. So glad we were able to meet with him and through him gain more MakerBot knowledge.
Oh, yes, the high school kids... They were there with their own FrankenBot, to be presented only 3 days at school. I only had a brief moment to speak with them, as I was told their father was circling the block angrily. They started the group a short while ago when one of them found out about the CNC Cupcake. Hopefully, we'll see them again.
Matt (yes, another one) who is a prospective group member came by as well. He is part of the Experimental Art discipline and is interested in joining LearnMakeCupcake, if time permits. We bounced ideas off each other about how to make the wearable social technology bracelet idea come together. He suggested making the item more versatile, and also mentioned that he had friends who made makeshift bracelets from the sleeves of wool sweaters. We weighed the idea of using Bluetooth and WiFi (leaning towards WiFi). Would really like to see this idea through.
Next week: I'll be creating Franks hair and cutting him at Metrix.
PS Alexis, Kevin and I all got our memberships at Metrix.
Sunday, April 11, 2010
Makerbot Madness
So after two weeks of constant jamming(even after adjusting the temperature) Bre reminded me to floss Franks teeth...As you can see in the picture below, they were quite gummed up.

But we then went to Makerbot Madness at Metrix on Saturday (4/10) where everyone was more than helpful to help us diagnose our printing problem...While there we did manage to blow up another PTFE Thermal Barrier, number 3 if you've been keeping track. But luckily Matt told us to turn down our temperature and slow down our printing speed. This did wonders for us! Frank has been printing up a storm. I essentially spent the past 48 hours making parts and playing with Skeinforge settings. Check it out!

So what you're seeing here are:
1.75x Wade's Geared Extruder bodies
2.5x Coin-op bottle openers cut
3.5x Makerbot Keychains
1x Coin-op bottle opener
1x Deluxe Makerbot light
When I tried to print Wade's Geared Extruder (The guys at Metrix are using the same style on their Reprap)I just couldn't get Frank to lay down even layers. As you'll see in the following pictures, either the base/raft is warped or somewhere mid-print the layer get's shifted, mind you these prints take just over 2 hours to complete so it's always a fun surprise to come back and seethe slightly distorted mess that Frank creates. From what I hear heated build platforms help take care of the warping issues, and make the material strong so I don't have to use as complicated fill's to make the object rigid...we'll see though.

Warpage!

Warped base and crooked layers. :(
OR maybe I roll the dice on PLA
Monday, April 5, 2010
My Spring Break
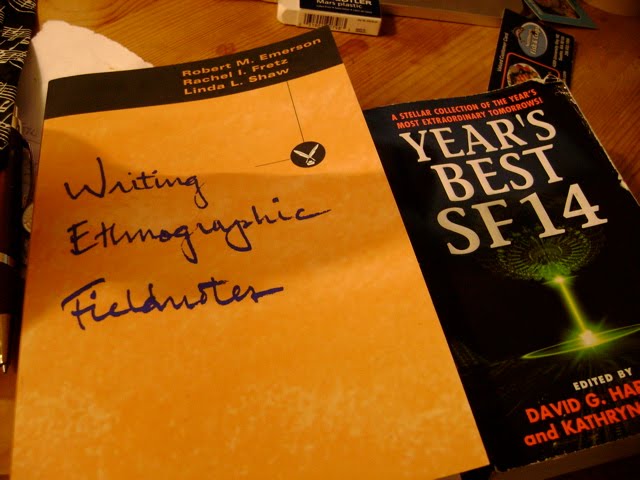
In the interest of expanding my mind and doing a better job of documenting this project I started reading two books:
Year's Best SF 14 (borrowed from Alexis) and Writing Ethnographic Fieldnotes. I won't know if these books will influence my participation in this project until we dig into things a bit more, but I will keep you posted. Naturally I hope I can take some decent fieldnotes now. Reading SF was about expanding my mind and trying to see the potential of technology. I can't tell if it worked.
Sunday, April 4, 2010
Getting back up to speed
Alright, now that we're all back from Spring break and classes are just about to hit full speed, it's time to update everyone on the situation. So right as we ended last quarter we bumped into some printing issues...And thanks to all you great followers we've concluded that we're not printing hot enough. However, this was not discovered until we had already broke our second PTFE Thermal Barrier. Luckily I stopped by Metrix on their Makerbot Madness night and was able to pick up a replacement. Now we'll be back in business next week.
Prior to the break, Bre came to Seattle and showed off his...shall we say "pimped out" Makerbot...making our Makerbot look quite boring. This inspired our group to try and customize ours too, so we ordered some LED's. Now I already had a few thousand LED's in my possesion so instead of buying a LED rope...I figured I'd just build one.

Yes it probably would've been faster if I bought an LED rope light...But where's the fun in that.
Along with pimping our Makerbot, we're looking at ideas of how to continue our research this quarter. A few ideas we had were, an Arduino project of sorts, building a reprap, a 3D scanner, and/or something along the lines of wearable computing. More on this later.
Wednesday, March 31, 2010
Recoflections
Arguably, I'm a noob. Most certainly, I will always be a noob in one respect or another for the rest of my life. This research group has not so much grown me as it has allowed me to see areas in which I need to grow. Perhaps that means next quarter will be a building-scaling, sky-flying, international-peace-building kind of quarter. Perhaps that means I'm now more responsible for what I do, the more I learn about myself. Perhaps I just need to learn to learn. That was one of our study goals, was it not?
Forgive me, I digress.
In the Beginning, there were the expectations and the goals laid out before a project yet unformed. A MakerBot yet made. Immediately I ventured out to discover this “community” this “niche” of people doing sweet electronics things. Of people holding the blueprints to the future. Maybe it’s because that, in retrospect, was one of my greatest curiosities. Maybe that’s something I need to return to. Regardless, my Google-searching lead me to wiki.makerbot.org, which lo-and-behold had a forum. I joined and after a single post, found that this was going to be far more exhaustive of a process than anticipated. As a sad concession to myself, I read over the instructions. I read through other sites’ descriptions of MakerBot experiences. I learned a taste for what my Creative Writing instructor would call the “about-ness” of our project. This collective sense of independence from a system, a way of thinking and doing status quo.
Pretty cool stuff. Tickled the Anthropology side of my education, and helped me bide my time as we all waited for Frank to arrive. It was a long few weeks.
I remember as we unboxed him, in his variety of acrylic, wooden, and silicon components, just really wanting to dive in. This is where I learned something about group dynamics. Working under the impression that “many hands makes for light work” I was forgetting this doesn’t imply less-time-consuming-work. I was clearly wrong. It was slow going, and everyone wanted to learn about how to build and solder and glue; confidence slowly building. People wanting to build their own computers and visiting Metrix:CreateSpace and catching some sort of vision, some sort of excitement. As for myself, I stood on what felt to be the periphery, quietly listening and building, nuts bolts screws missing parts music enabling, and waiting.
At this phase in construction, seeking something meaningful to learn at “home”, I began researching CAD software and getting acquainted with Google Sketchup. Powerful, intuitive, and surrounded by a solid support network, I spent several hours getting used to the creation process. I was impressed, and felt like I was really getting the hang of things but… turns out we’re not using Sketchup. There’s this other software that incorporates a couple distinct processes that elsewise requires a couple programs. *face-palm* Story of my life.
Having reached the end of the quarter, and general busyness vamping up, I was able to do little else besides attend meetings and make a impromptu trip to Metrix. I met Bre there, and he seemed pretty legit, and someone had build a laser-light projector that was frickin’ sick. Got another taste for what this community seems to be about… a certain freedom from impossibility. A certain freedom from “oh, no. That’s ridiculous.” A place where people seem to have found their painting medium not to be oils or chalk or hardcore-parcore, but in silicon and stepper-motors and hot plastic.
All told, I’ve learned more about groups than electronics. Less about not how /it/ works than how /they/ work. And somehow, I can’t wait to do it all over again next quarter. To find myself a noob once more.
Monday, March 15, 2010
Intro to Electronics at Metrix Create:Space
Today I attended the Intro to Electronics workshop (taught by Morgan) at Metrix Create:Space. I created three simple circuits that made an LED light up, fade, and blink. As usual, I fail to see the potential applications of my new technological prowess. It's as if I have no context for the things I am learning. On the bright side, I showed my boyfriend how to make circuits on a breadboard and helped him recreate the simple circuits. Teaching is great way to reinforce your own knowledge. teaching a smartypants like my boyfriend is a great way to learn more--his knowledge of physics helped ground (so to speak) my new practical skills. Anyway, a moment ago I checked Google to make sure I was spelling "breadboard" right and the first Google result was this little video starring none other than Bre Pettis. So if you want a five-minute tutorial on using breadboards for electronics, check it out. I suppose if I need a little help envisioning cool applications for electronics, I know who to ask (Google).
Wednesday, March 10, 2010
Printing
So after last nights meet-up at Metrix create:space, we now have a functioning makerbot. Today I tried to take what we learned from Bre and all the other helpful folk at Metrix to make our makerbot print. Fast forward, and five hours of work later and we have this lovely mess.

In this tangle of noodles, failed rafts, and half printed objects, we have these guys

one Android head and one bottle opener....both turned out pretty nicely, but upon first use, the bottle opener failed...
 .
.
At that point, everything went down hill, partly due to me and partly due to frankenbot getting tired. After printing the bottle opener, I remembered that Matthew at Metrix told us to make sure that the z-axis components were tightened, so I partially took apart Frank and tightened up the components. When I tried to print again, the plastruder kept getting jammed. The last 3 hours of my day were spent troubleshooting and trying to figure out why frank would print half of the raft then unexpectedly have the feed get jammed. I suspect something is misaligned, or not getting heated properly, so we'll be taking the plastruder apart and investigating the problem.
In this tangle of noodles, failed rafts, and half printed objects, we have these guys
one Android head and one bottle opener....both turned out pretty nicely, but upon first use, the bottle opener failed...
.At that point, everything went down hill, partly due to me and partly due to frankenbot getting tired. After printing the bottle opener, I remembered that Matthew at Metrix told us to make sure that the z-axis components were tightened, so I partially took apart Frank and tightened up the components. When I tried to print again, the plastruder kept getting jammed. The last 3 hours of my day were spent troubleshooting and trying to figure out why frank would print half of the raft then unexpectedly have the feed get jammed. I suspect something is misaligned, or not getting heated properly, so we'll be taking the plastruder apart and investigating the problem.
Tuesday, March 9, 2010
Python.org
Note: When needing to download Python, DO NOT type in http://python.com. It's PYTHON.ORG.
*red face*
*red face*
As I was sitting at Metrix Create:Space last night, I was in awe at the amount of people there. Meeting Bre Pettis was "wow." Very "geektastic"! He was so down to earth, and sat down with us to troubleshoot our first runs with Frank. How many people can say that?! Take that losers! Bre Pettis touched our Frank. Wait, that didn't sound right. You get what I mean.

As my quarter with LearnMakeCupcake comes to a close I think retrospectively about what I've learned from this group. Yay, I know how to put a MakerBot together!
The people at Metrix Creat:Space: I would list all of them but (feeling like a douche) I've forgotten some of their names and don't want anyone to feel less important than the other, because everyone helped make our learning possible. Having a face-to-face with people who have developed their version of the MakerBot with or without a kit, unlike our fancy shmancy batch 9/10 model, made for the perfect "guerilla learning" session each time we went into Metrix. They've tested their models and passed their knowledge of the trial and tribulations to us. Their demeanor was welcoming, patient and open, which increased my yearning for more. Can you imagine wanting to spend your Saturday night working on electronics in a basement? I can, and have fun doing it.
Alex, Alexis, Cristina, Kate and Kevin have been a constant source of inspiration and geekiness. Throw their names at anyone in the department and they'll tell you, "Ouch," (I'll be here all week! Tip your waiter/waitress!) then they will let you know that we have some of the brightest minds on our department.
Beth, who has led the MakerBot effort, is nothing short of the "most patient person in the world". Thank you.
I still have a video and some pictures to upload... Looking forward to next quarter.
Monday, March 8, 2010
Everything You've Heard is True
I was hanging out with my friend Chad over at the art building today where he's working on an old school model of a Boeing cockpit for his final project in an art class. I picked up some wood scraps that I thought would make nice end stop triggers. I also mentioned to Chad that I had to go to an unexpected research group meeting at Metrix Create:Space because "this guy Bre is in town." Chad was all, "Bre? Bre Pettis? He's in Seattle?!" I was like, "Oh, you know him?" all nonchalant. But I was not faking my nonchalance as I normally do; I truly had no idea who I was about to meet. Of course I knew that Bre founded Makerbot. Of course I knew that. I just didn't know what that meant. And I didn't know everything else he's done.
I'm glad my introduction to Bre was face to face, and that I wasn't starstruck because that's always awkward, isn't it? When I got home, I did a Google search and it pulled up 18,700 images of Bre in like, you know, 1.2 seconds. Including this one of our research group with Bre tonight at Metrix. (We're looking off into the not so distant future when our Makerbot actually works.)
Bre told me we really don't need endstop triggers. He also wrote this amazing blog entry about sharing. I found out from Google that Bre has been a schoolteacher and puppeteer, and I would have liked to ask him about those experiences. Oh well, maybe next time. Until then, I am sure I can read all about it online.
It has been FAR too long
Pure insanity enveloped the past month of my life, hence my lack of posts for the last 3 weeks....(holy cow, time does fly)
Anyway, this post goes has information that dates back to the broken middle filament guide (which I happened to break), but I'll use this as a jumping point. Our weekly meeting, on Feb 17th, was moving along nicely, however when Alex and I nearly finished the construction of the Plasruder mk IV we realized that the screws attaching the insulator retainer we realized that the proper length bolts to attach it to the Plastruder body were nowhere to be found. Quickly inventorying our parts, we knew we had an excess of regular(longer) m3 bolts, so I decided to cut them to length and make our own bolts.
The first cut bolt worked perfectly, not to long, not too short; however, the second bolt was just a tad too long, and we tightened it just a tad too much, then the most gut wrenching sound...*POP*. I'd heard this sound before, making Lexan windows for a race car, and I knew what it meant even before I looked down. Yup, we had cracked the retaining plate and successfully dislodged the retaining nut. Looking at the situation, I knew we couldn't repair the piece, there wasn't enough material to glue back together, so the only thing we could do was wait and order a new one. Before we made the call out to Bre, we decided to take inventory and make sure we had everything. We quickly noticed that we were missing one more vital part, the retaining washer for the heater assembly. Well, in my mind this worked out perfectly because without either piece, we were stuck at the same place, and with one order of parts we should be back on our way. I reported to our group leader, Alex at the time, to email Bre and order the middle filament guide plate, and I also pointed to a picture of the retaining washer for the heating element to be ordered. There was a slight misunderstanding on the parts order though, clarified in Kate's Feb 24th post.
Anyway, we're jumping ahead to last week, March 3, since Kate's post for the week of Feb 24th is pretty much the definitive description of what happened. Darivanh, Alexis, and I were set to go to Makerbot madness at Metrix create:space on Saturday the 27th; however everyone managed to overbook themselves for the weekend, and no one was able to make it. I had already packed up Frank (short for Frankenbot) and had him the in back of my car ready to go. Since I was unsure about showing up to Makerbot madeness alone, with a partially assembled makerbot, I decided to fix the terrible mistake I had made 2 weeks prior. I took the two bolts we had made and trimmed them down a bit more and sanded them flat to make sure that they would not have any clearance problems. I then open the box that Bre had sent us and quickly realized that instead of receiving the washer, we got more Kapton tape! I then remembered what the picture I had pointed to looked like.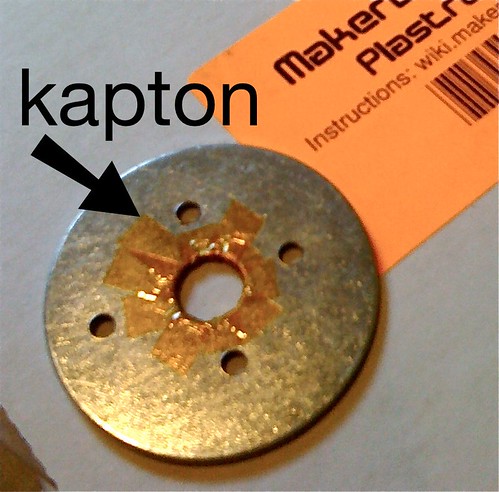
and facepalmed my communication error, regarding what part to order. Fast forward to Wednesday and to our group meeting, we try to figure out a quick solution to this missing part. It just so happens that my roommate works at a machine shop and he is willing to make me a custom washer, but I told everyone that this would be a last resort. Then the obvious solution jumped out, contact Metrix! They had 2 makerbots, so it'd be a pretty good guess that they might have extra parts, and might have our missing part. Luckily, Matt responded to our email quickly and the next day I was able to pickup the retaining washer for FREE!!! Thanks to Matt and Metrix create:space!
Friday, March 5, 2010
Opening to Innovation
I had an interesting revelation and I have been meaning to share it on the blog. My boyfriend, Sam, belongs to a chemistry research group here at UW. The other day, he told me that one of the group members asked the PI if she could get a computer to help with her research. The PI asked the student if she had ever built a computer before. She hadn't. The PI told her that if you've built a computer before, you can just order one online, but that if you haven't built a computer, you had to go to newegg.com and order the parts and build a computer.
"Ugh, that is a terrible policy!" I said.
"No it's not," Sam responded.
"Why not?" I was a bit curious how he was going to defend something so blatantly absurd.
"It's a good skill to have," he informed me. I paused and thought about it for a moment. I haven't actually owned a computer in awhile, and I really need one. I have been dreading buying one because they are always so annoying...filled with a bunch of junk that takes ages to load, plus I am always worried I bought the "wrong" one, you know, there are so many brands, plus they are so expensive and then you will probably get robbed or it will break...I have a lot of very solid reasons for not owning a computer in 2010. Finally I responded,
"Well, we should build one then. Together. You know, quality time."
In case you think this exchange is embellished or fabricated: yes, I tend to exaggerate. But this really did happen, and it wouldn't have happened nine weeks ago. What is happening to me?
Oh, and I kind of figured out how this project connects to HCDE, and how HCDE connects to what I want to do. I know everyone's really been on the edge of their respective seats about this stuff, but you'll just have to wait for my next blog entry.
One more thing...you may have noticed that I just learned how to link to stuff (where will this new-found facility with technology end? Okay so linking is not exactly technical if you're using Blogger) so I want to say thank you to Metrix for all their support and enthusiasm for this project. I'm going to be at Metrix a week from this Sunday for the intro to electronics class, you know, not that I need an intro class; could probably actually wire a house like, in five minutes, by myself. I'm kind of a natural at these technical sorts of things.
Retainer Washer Is In
Yipee! Kevin walked in this morning with the retainer washer! Many thanks to Matt from Metrix Create:Space!!!!! We are officially ahead of schedule. Wiring was done on Wednesday and the washer will be put in today!
This is so exciting.
This is so exciting.
Wednesday, March 3, 2010
We're Hot! MB Instructions R Not.

Check out Kate, Darivanh and Kevin (from left to right). Gosh, we're hot!
In other news, I had just installed the Z endstops when I came across this step:
Make endstop triggers - Endstop triggers can be constructed of any long, reasonably thin, opaque object. Popsicle sticks (craft sticks) are popular choices. You can cut rectangle of thick card, as well. Paint your triggers matte black to make them a bit more reliable.
I don't have any popsicle sticks, nor did I know I would need any, or else I would have enjoyed some popsicles earlier today. Seriously, this is another instance where I feel betrayed by these instructions. You could argue that I should have read through the instructions before starting, but that's not really how we do things around here...
There's a paragraph at top of this section that explains that you don't really need endstops, but it fails to mention that endstops aren't supplied in the kit. I think we need endstops, so I am going to the store to buy popsicles.
How to Write Instructions
1. Write instructions in the imperative mood.
2. Tell the reader what he or she needs to know before he or she needs to know it.
3. Avoid imprecise language like "reasonably thick" and "a bit more reliable." What does reasonably thick mean? Can I use a piece of paper? What about cardboard, is that too thick? Why would painting a popsicle stick make it more reliable?
Building the Builder of Tomorrow
So, the quarter's almost out.
The super glue is half-empty, boxes have been opened, and within all our lungs there has accumulated soldering smoke. Unto blogs, posts have been made. Contacts reached. Parts lost and found and shipped and broken.
And we're not done yet.
The most surprising thing to me about this whole project is how a grad student, several seniors, and me -- a lowly junior -- can come together with our various skills, and not be "above" any other person. We're all new, I know I certainly hadn't heard of a makerBot before this, as hadn't some others. I haven't felt for a moment that what I had to offer the team was unneeded, or that our academic levels of experience set anyone either ahead or behind. I think this is a kind of educational system that just works.
Sure, it's slower. In the back of my head the whole time, I'm like, any of us could totally whip this out if there weren't 5 other folks also wanting to learn this thing at the same time. It's like 7 people all trying to swim laps in kiddie pool. But that's not the point. The point is that when it when it comes down to it, I'm confident any single member of the team could now sit down and teach another group. Easy. With significantly fewer read-through of the wiki.
There's so much potential here. It's almost staggering, surreal, when you really stop. And think. We're printing our own stuff.
I'm free from the market.
Well, at least almost.
Wednesday, February 24, 2010
While We Wait
Today we had our weekly meeting. We’re waiting on two replacement parts—a filament guide that cracked during assembly (image), and a replacement Kapton. The filament guide cracked when we attached the screws—I’ve surmised that the screw was over-tightened, which put too much stress on the part. Alex can respond to this post if I have it wrong. The Kapton we either lost or didn’t receive; we’re not quite sure.
UPDATE: So we didn't know what the heck Kapton was. It's " polyimide film developed by DuPont which can remain stable in a wide range of temperatures" (thanks Wikipedia). The picture in the instructions makes it look like the washer with three holes in it is called a "Kapton" because there's an arrow point to the washer that says in huge letters: KAPTON. So we ordered kapton and we should have ordered a washer. Metrix Create: Space saved the day; Matt gave us a spare. Hero.
Since we can’t move forward without the replacement parts, we spent the meeting discussing data collection and potential grants for this project. Beth asked us to articulate how our project connects with HCDE, so you may see a few blog posts exploring this topic.
Also, the MakerBot group has agreed to present a poster at the College of Engineering’s open house, “Discovery Days,” on April 23rd and 24th (http://www.engr.washington.edu/alumcomm/openhouse.html). Come check us out!
Here's a picture I took of the broken (middle) filament guide, because pictures are fun:

Sunday, February 14, 2010
Making the makerbot week 3
Making the makerbot week 3
After a small debacle/confusion last week over the assembly of the x-y axis, Bre emailed us and informed us that we had a 9th batch makerbot. This was very important because in the 10th batch many parts were changed. Today we discovered that, contrary to popular belief, the kit we had, as I termed it, was a frankenbot. As Darivanh assembled the z-axis, she discovered that she was missing the proper plates to support the z-stage on the 4 threaded rods. After searching high and low for the proper pieces, someone happened to change the assembly instructions to the 10th batch page, and lo and behold, the instructions for the 10th batch worked for our makerbot. We quickly found the parts that we needed and Darivanh, Kate, and Cristina quickly assembled the z-axis for the “frankenbot”. While this was all going on, I was wrestling with assembling the plastruder. Alex had soldered together the temp sensor and after Darivanh’s run to the AA wind tunnel (her friend who works there had a multi-meter) we were able to cut the Nichrome heating wire and solder it leads. After Alex soldered the these two items, we discovered that even though we had most of the correct parts for the 9th batch, we were missing a bolt for x y assembly, thusly we sent him on a quest for the bolt.
While he was out, and Darivanh and Katie were assembling the z-stage Katie had a question about the stepper controller. This was because the instructions for called for the installation of the z-stage caused a great deal of confusion. The instructions described the stepper controller using 2 different names. The other confusing part in the instructions was that the orientation in the following pictures was changed and the devices did not look the same. However, it only took a few moments to decipher the image and the image and help Kate on her way.
This week the makerbot made a significant amount of progress, and it looks more like a working product than ever before. Hopefully everything will continue fairly smoothly and we’ll have a working machine in no time.
Tuesday, February 9, 2010
Intro to Electronics at Metrix
Alexis and I signed up for an Intro to Electronics class. I'll have to tell you that electronics has always scared the hell out of me. Mostly due to my fear that I somehow make an LED explode in my face.
Morgan was our instructor that evening. He introduced himself as an EE graduate at the UW (Yay!) and loved teaching and it shows. Morgan was able to place all knowledge based material on a level agreed by the class. He made it a point to ask if anyone had questions about the material discussed. More importantly when he answered it was in a manner that was encouraging and comforting. Although this was an introductory class he did not speak down to us and tried to walk us through any trouble we might have.
The class progressed by simple configures on a bread board (using a tool kit provided by Metrix, including wires, resistors, etc...) to a more complex structure. 4 or 5 electronic configurations total.
Some of the students had trouble lighting the LED and Morgan, with his understanding tone, ensured us that we would personally receive help from him. I had the toughest time with my last configuration. Alexis, another classmate, and Morgan were assisting. Keeping the other classmates in mind, and without rushing me, he was able to walk me through each step without a demeaning tone/manner.
Metrix, yet again, has surprised me (in a good way). Morgan was an EE "nerd" and he was so personable. Morgan, if you ever read this... You're awesome! Electronics has always been an inaccessible realm of knowledge for me and this class has definitely squelched my fear of learning more. Though I'm almost positive I'll still have some form of electronics blow up in face.
It's Only the Beginning
Cristina and I arrived at the DDI Lab at 3:30 greeted by Alex who informed us that there were endstops that needed soldering. Cristina jumped at the chance to do some soldering. She was a novice in the true sense of the word when it came to soldering. Alex was able to walk her through the process, but it was difficult for her to grasp. She asked Alex to physically show her how to solder. With some practice I think Cristina could solder. There seems to be a need for “the right touch”, knowing a good ratio of electronics solder and heat/pressure/timing.
I put neodymium magnets into the wooden building platform and the Y Stage pieces using the allen wrench and pushed the magnets into square holes within the pieces. The magnets are cube shaped and golden in color. Not on the “shopping list” was super glue. It is used to keep the magnet in the holes.
Alex has assigned Cristina to pull parts together in an organized fashion; gathering the materials of certain parts of the Makerbot. The pieces are laser cut onto wooden boards and we take them apart by pulling them up from the board, like a jigsaw puzzle.
As I was helping Cristina gather the materials, we were having a hard time distinguishing the difference between the different nuts and bolts. Would be great to have them all labeled without having the time consuming task of looking it up online.
Alex gave me the assignment of putting the body together. I used the wiki for instructions and the parts list. The parts of the pictures list were different and only afterward did I read the note that stated the pictures were from an earlier batch and may be different. We marked the nuts and bolts bags, because they were not clearly marked.
Saturday, February 6, 2010
Looking back at this week with the makerbot, we have made significant progress with it's construction. This week I finalized the soldering of the endstops. Last week we assembled the endstops and gave everyone the opportunity to build the endstops and learn to solder. Last week Alex, Alexis, Cristina, Kate, myself, and even Beth! assembled them. After that Alexis, Kate, and I soldered our boards together, but didn't have side cutters to trim the excess leads off. When I arrived to the research group this week, it Cristina had already soldered the other 3 endstops. Everyone did a great job soldering and I was fairly impressed since everyone stated that it had either never soldered before, or it had been a while since they had soldered. After clipping off the excess leads and ensuring that all the solder joints were solid I moved over to help Alex assemble the plastruder.
While I was working on the end stops Alex commented that he had reversed the polarity of some of magnets that hold the Y-axis plate on to the x axis base. Since the magnets were installed using super-glue, we were worried that we wouldn't be able to remove them, however using an allen wrench we were able to remove the magnets. Alex finished the y-axis platform, then we began working on the plastruder. Since the entire plastruder is constructed of the acrylic we had to peal all the protective paper off the plastic. This process took a significantly longer than I had expected.
Darivanh was a little tired that night, but she did an excellent job creating the makerbot body. She had one problem attaching the bottom to the side of the body. However it was a simple fix and she was able to do a lot of work on it. Alexis and Cristina worked on the x axis of the platform. They encountered some problems when they were attaching a pulley to the stepper motor. They needed to sand down the shaft of the stepper motor before the pulley fit, since we didn't have any sandpaper in the workshop, we had to improvise, hence they used an emory board to make the shaft a little bit smaller.
After working on the makerbot for several hours, Alexis, Christina, and I went to the Dorkbot meeting. I had never heard of this even before, but doing some research I found out that it had been around for a while. Since I'm still not quite in tune with Seattle geek culture I don't have the contacts to tell me when things like this happen. This nights Dorkbot meeting was focused around several key speakers, since I couldn't stay the entire time, I only saw 3 different talks, but there may have been more. While there, we saw first hand a home built version of the makerbot, and Matt's Metrix counterpart the RepRap. The talk was interesting and provided much insight into the other technologies that were being implemented to help the community gain the ability to build 3D models. One of the more intriguing things I had heard that night was the use of flower and glue as a method of 3D modeling. There is a lot of work going into making 3D modeling even cheaper and more available for the general public and the next couple years we should be seeing these machines become more widely accessible for the general public.
Thursday, February 4, 2010
Building, and getting sentimental about it.
This afternoon we began day two of Makerbot construction.
As I sat and chatted with one of my teammates--at the same time trying to carefully follow some online documentation for the Makerbot--I realized that I was feeling much more more relaxed and willing to enjoy the process of collaboration than last week. No time for social anxieties here--Christina and I had a very concrete and shared goal: construct the X stage. Alex and Kevin worked on building the Y stage, and Darivanh (after being kind enough to set up a computer in the corner to help the rest of us record our data) built the outer frame of our Cupcake. By the end of today's build session, we all looked pretty damn proud of ourselves.
After finishing up all of that, Christina, Kevin and I decided to go to this month's Dorkbot meeting--conveniently held on the University of Washington campus. There were some interesting speakers tonight: Dominic Muren (an industrial design professor at UW), Willow Brugh (director of Jigsaw Renaissance, a makerspace in West Seattle), and Matt Westervelt (who we met a couple weeks ago on our field trip to Metrix: Create Space). The three of them talked about 3d fabrication, makerspaces, and the do-it-with-others (as opposed to DIY) ethic. At the ten minute break, one of the organizers mentioned that there were five times more people in attendance than usual. I felt like I was witnessing the seeds of some sort of revolution.
I'd heard about Dorkbot before, but was always too afraid to go. Meeting new people--especially those who strike me as particularly intelligent and creative--has always been kind of scary for me. But, aided by the presence of my teammates, I managed to work up the courage to check it out tonight--and I'm glad I did. The overwhelming sense of warmth, community and excitement I experienced at Dorkbot soothed any remaining nerves I might have had on the way there. The values that everyone in the (extremely crowded) room seemed to share were infectious and inspiring. I left thinking about the importance of cultivating sustainable and creative communities, making learning fun, and taking time to enjoy the process of creation as much as the product.
My fear of going to Dorkbot sort of brings me to what I hope to get out of participating in this project. Obviously, the goal is to learn how to build a Makerbot. But it's also a little more than that. For me, it is about learning to be fearless, both in terms of my interactions with other people and the things I choose to learn and do. I'm tired of being too scared to engage with the world in the way I want to, and this project seemed like a great way to kickstart the process of reversing that fear. I want to be able to be a part of the community of learners and doers that exists right around me. So that--and getting to play around with some seriously cool technology--is what motivates me to come to this little windowless lab every week and sort through nuts and bolts of various sizes.
Wednesday, February 3, 2010
Delight
It's the middle of the quarter and I'm starting to get snowed under with other teaching responsibilities, so I didn't read the blog for a bit, and I have been providing absolutely zero leadership for this project -- mostly by design, but now also by necessity. My big accomplishment this past week: registering a mailing list for the group. We meet at 4.30 on Wednesdays in our labspace, and by 3 (while I was with another group), there was one student looking for access. Another appeared around 3.30. When I wandered into the lab a little after 4.30, all 5 of them (one is sick) were at work. I'm staring around the room, watching them focused on building, researching, collaborating, and it's delightful.
I also know they'll all read this at some point.
Hang on. I'm going to ask them a question.
"Raise your hand if you're having fun!"
5 hands raised. Actually four. One responds, "Me! I can't raise my hand because I'm twisting." Twisting wire, that is.
Now I'm going to stop writing about them. Because let's face it -- it's kind of weird.
But we've got data collection processes in place, lots of photographs uploaded, and multiple collaborative workspaces in the cloud. It's interesting to see the need for new collaborative tools emerge as our work processes change.
Undoing the World, One Resistor at a Time
This week, I've really been thinking about something rather remarkable about what we're doing.
We're on the cusp of completely destabilizing the world's economy as it exists today. Seriously, it's ridiculous, and yet completely enthralling. And it's happening now, all over the country, in cafes and garages. In research groups and basements.... one soldiered OptiSensor at a time. It's incredible, and yet even I can have a hand in this new Industrial Revolution of sorts.
It didn't really hit me until we got the components, a rather intimidating assortment of odds and ends to be quite honest. Each in their own bags, the future awaiting to be assembled. Immediately, I wanted to dive in! To grab a bag and have at it, some may say this is evidence of a vein of recklessness in me, I'd like to call it a Spirit of Adventure, but regardless of my personal inhibitions there was also the group to consider. I guess I realized in that moment that we're all trying to learn, and to accommodate each of our goals is going to be tricky but necessary.
Huzzah to the builders of tomorrow's builders! =)
~Alex
Monday, February 1, 2010
Collaboration, Rumination, Goal-Formation
Our last meeting reminded me of a reality TV show: This is the true story of six strangers picked to inhabit a windowless room and have their lives taped to find out what happens when people stop being polite, and start building a MakerBot.
It’s one thing to order a MakerBot kit, unpack it, and decide for yourself how you want to proceed. It’s quite another to negotiate building a long-ish term project with six other people.
A couple group members wanted to dive right in—that is, grab whatever parcels they fancied and set to work immediately. Other group members objected to this method, on the grounds that the goal was for each of us to gain literacy (of a sort) with each component of the MakerBot.
In the midst of it all, surrounded by plastic-wrapped bundles of hardware, I realized I wasn’t sure what my own goals are for the project. Do I want to be able to make a MakerBot from start to finish, all on my own? Do I want to be able to share technical skills I have learned? Am I interested in acquiring technical skills, or am I interested simply in articulating how I acquire technical skills?
A little background about me: In my house, if a light bulb burns out, I declare the lamp “broken.” If the battery in my watch dies, the watch retires to my junk drawer forevermore. To be perfectly honest, “defragging” sounds like something you do to get rid of a Fraggle infestation.
I know, I know… as an HCDE Masters student, I need technical skills in order to be competitive in the Real World. And so far I’m still figuring out what skills I need, let alone how I will acquire those skills. Community college coding classes? Electronics for Dummies? Informal tech communities?
At this point, my goals are best described by a HCDE buzzword: emergent. But the task of defining and pursuing my goals is rather more urgent.
Thursday, January 28, 2010
Building the Makerbot
We opened the Makerbot box and it was awesome. Bags were flying. We began our evening speaking to Bre Pettis who gave us tips on ways to build the bot and to reference the wiki for help. There was an inventory sheet that was pretty basic. Our first feat as a group was to take inventory. As we unpacked the box, Cristina took pictures and video to visually document our progress. Alexis, Kate, and Alex took charge of inventory. Once inventory was complete there was a lull and a fog of indecision. Beth stepped in and suggested we decide on a leader to help us progress. We agreed to decide leadership by week. Our first leader would be decided through “Roshambo” or “Rock, Paper, Scissors”. Kevin came out the victor for the first week. Alex as the second runner up would be our leader for the second week. Kate opted out as leader, while the remaining group members were assigned leadership week in alphabetical order. Since there were 5 leaders and 6 weeks remaining in the quarter, Beth agreed to lead the final week.
Building and Soldering
We weren’t quite sure how to begin; there was no instruction manual. Nothing in the box indicated a starting point. We decided to pull up the wiki and see if that would help. I remembered that we needed items from our “shopping list”, which included: a soldering iron, some soldering material, wood glue, and tape. Kevin mentioned that he had a soldering iron and some material in his office, which he retrieved. I asked the main office for some tape. When I returned we scanned through the wiki for a starting point. To get to the guide on the wiki we clicked on the ‘CupCake CNC’ link at the top of the left-vertical navigation bar. The “Before You Build” link is on that page and houses the list for our “shopping list.” There were some sequential material regarding the materials, but everyone was so excited to start the building that we jumped ahead to the electronics assembly.
Alex and Kevin led us in building the assembly. There were six boards we needed to build and there were six groupmates so we all grabbed a board and with Alex’s guidance we were able distinguish the names of the pieces and how they fit onto the board. We followed the link shown on the wiki and piece-by-piece each built the assembly. Some of the questions that arose were:
Soldering could now begin. Kevin checked on the soldering iron that plugged in before we started but returning to it he realized that it did not get hot. The plug was in, so Kevin jiggled the plug and for some reason it started getting hot. As Kevin worked on the soldering iron, Alex noticed that we just set up 2 extra assemblies. We only needed 4 of the assemblies and needed (2) 3 pinned assemblies. After having some trouble taking the 2 extra assemblies apart, I helped Alex with that board since I had nails.
Kevin was able to show us how to solder the pieces to the board. This is done when the soldering iron is hot. Kevin and Alex assured us that if a mistake is made while soldering fixing the solder would require merely taking the bad solder off and redoing the solder. The metal parts of the pieces that stuck out from the board were bent to avoid falling out of the board when soldering. Placing the board upside down; metal pieces sticking up, Kevin used the wire (which we were told is made of led and instructed to wash our hands afterward) by touching it against the metal and melting the wire onto the metal piece creating a metal bond. Kevin also instructed us to breathe out as we are soldering to avoid breathing in the fumes and to cool the melted bond. Alexis was able to try her hand at soldering and received praise by Kevin for her clean soldering.
Unfortunately, due to time constraints the remainder of the group was not able to solder.
Building and Soldering
We weren’t quite sure how to begin; there was no instruction manual. Nothing in the box indicated a starting point. We decided to pull up the wiki and see if that would help. I remembered that we needed items from our “shopping list”, which included: a soldering iron, some soldering material, wood glue, and tape. Kevin mentioned that he had a soldering iron and some material in his office, which he retrieved. I asked the main office for some tape. When I returned we scanned through the wiki for a starting point. To get to the guide on the wiki we clicked on the ‘CupCake CNC’ link at the top of the left-vertical navigation bar. The “Before You Build” link is on that page and houses the list for our “shopping list.” There were some sequential material regarding the materials, but everyone was so excited to start the building that we jumped ahead to the electronics assembly.
Alex and Kevin led us in building the assembly. There were six boards we needed to build and there were six groupmates so we all grabbed a board and with Alex’s guidance we were able distinguish the names of the pieces and how they fit onto the board. We followed the link shown on the wiki and piece-by-piece each built the assembly. Some of the questions that arose were:
- “Is there a wrong direction to putting in the resistor?”
No the resistor could be placed in any direction as long as each is placed in the correct holes.
- “How do we know which resistor goes where?”
The wiki shows us the correct order. The resistors are distinguishable by colored stripes.
- “Which end of the LED goes in where?”
This was the most difficult issue we dealt with (besides where to start and how to choose a leader). As we scrolled down, there was a step on the LED. The instruction mentioned something about the short wire of the LED being adjacent to the flat portion of the silkscreen. We did not know what that meant. Alex looked at the board and noticed that the white print on the board has a flat portion where the LED is to be placed.
Soldering could now begin. Kevin checked on the soldering iron that plugged in before we started but returning to it he realized that it did not get hot. The plug was in, so Kevin jiggled the plug and for some reason it started getting hot. As Kevin worked on the soldering iron, Alex noticed that we just set up 2 extra assemblies. We only needed 4 of the assemblies and needed (2) 3 pinned assemblies. After having some trouble taking the 2 extra assemblies apart, I helped Alex with that board since I had nails.
Kevin was able to show us how to solder the pieces to the board. This is done when the soldering iron is hot. Kevin and Alex assured us that if a mistake is made while soldering fixing the solder would require merely taking the bad solder off and redoing the solder. The metal parts of the pieces that stuck out from the board were bent to avoid falling out of the board when soldering. Placing the board upside down; metal pieces sticking up, Kevin used the wire (which we were told is made of led and instructed to wash our hands afterward) by touching it against the metal and melting the wire onto the metal piece creating a metal bond. Kevin also instructed us to breathe out as we are soldering to avoid breathing in the fumes and to cool the melted bond. Alexis was able to try her hand at soldering and received praise by Kevin for her clean soldering.
Unfortunately, due to time constraints the remainder of the group was not able to solder.
Tuesday, January 26, 2010
Our Night Out at Metrix Create:Space
Metrix Create: Space is a very low key basement shop in Capital Hill. So much so that Kate and I, who drove, passed the shop at least 2 times without realizing it. Adjacent to the Seattle Museum of Mystery you are greeted by a giant hairy, yet welcoming, Sasquatch statue reminiscent of the movie Harry and the Hendersons. I have to admit that it wasn't like we were walking into the Cheers bar in terms of friendliness but boy were we greeted with smiles. Everyone was quite welcoming as we introduced ourselves. We wanted to learn and they were willing to do whatever possible to help and direct us to help in our learning process. We first met Matt, the owner, and told him Beth says, "Hi". Giggle. Like Alexis, I was quite intimidated by the thought of going to Metrix Create:Space. I pictured a dark dank nerd-filled space with the air of intellect and closure. Instead of the cold shoulder, they gave us a tour of the shop and we were shown a room that housed the 2 in-house Makerbots, the different materials used, and a laser cutter (not part of the Makerbot process, but cool nonetheless.) We were then introduced to Matthew, who is a Systems Administrator at Google during the day and a Makerbot enthusiast by night. He knew the ins and outs of the Makerbot and created a copy of the Makerbot from scratch, using much of the same materials. Unfortunately, the cost of building one from scratch was equal to buying a kit. Throughout the night I felt like Matthew was our guide into this Makerbot world. He introduced us to so many new facets of "Makerbotting". It was a quick, private, interactive how-to-Makerbot session. I really appreciated the troubleshooting tips, such as using painter's tape to avoid warping the platform. The patrons were not hermit intellectuals lacking social skills at all, they were very cool and welcoming. Smiles all around and asked us back. During our evening of learning, a man brought his son to see the Makerbot in action. The awe in the boys face was amazing. Who would have thunk it, Metrix Create: Space is also family friendly! As a matter of fact Matt, the owner, mentioned his son, Mason, age 4, frequents the shop on Tuesday nights. As I recalled the evening to my husband, he quickly made plans to hire a babysitter for our younger son so that we could bring our 5 year old. I really enjoyed my time there and learned so much, being able to touch and smell the Makerbot and its creation was a great bonus.
Wednesday, January 20, 2010
Kevin's Bio
I am an all around geek. Luckily I’m in the HCDE undergraduate program which lets me dabble in all things technical, from ideation to creation, I have some technical skill to help the process along. I am personally vested in ubiquitous computing and it’s implication of the loss of privacy, interaction design, self-directed learning, and the social impact of current web technologies (alteration of social dynamics). I also have an unbridled passion for anything technical and mechanical, I love to watch and figure out how things work. Let the Makerbot madness begin!
Subscribe to:
Posts (Atom)